Description
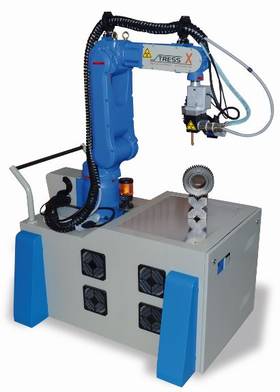
StressX could be mounted either in a closed cabin, suitable for laboratory analysis or on a four wheel trolley for on site analysis.
Residual Stress could be induced by machining, grinding, rolling, deep drawing, welding, thermal hardening and shot peening; its quantification allows to prevent fatigue damage and to control material’s durability and safety.
StressX provides a flexible solution to residual stress determination on samples of any dimensions by the original synergy between compact X ray diffractometer and 6-axis robot.
6-axis robots are available with positioning accuracy and repeatability as low as 20 μm and positioning range as high as 895 mm radius from robot center.
Measuring target is defined by a combination of a Video camera for X-Y pointing and a laser for Z positioning.
Laser accuracy can be less than 10 μm and measuring range can be as high as 300 mm from the goniometer center.
Thanks to the 6 degree of freedom the measuring positions and angular ranges are only limited by robot size.
Software
From Data Acquisition and having the full control of all the process and hardware settings to Data Analysis, calculating the residual stress or retained austenite values, the StressX software is extremely easy to use software for Uni-axial, Bi-axial and Tri-axial residual stress state analysis has been developed in compliance with ASTM E915 practice and UNI EN 15305
- Acquisition time / steps: 30-120 s
- Number of steps: 5-13
- Peak position determination by profile fitting taking into account theoretical constrains
- Uni-axial, Bi-axial and Tri-axial stress state analysis
- Normal and shear component analysis available for Uni-axial, Bi-axial, Tri-axial measurements

- X-Ray run-up and control
- Library functions for material and measurement parameters
- Controlling detectors, DC motors, power supply, shutter, safety interlock functions, etc.
- Ω-mode and χ mode
- Operating system Microsoft Windows
- Project Manager
- Surface mapping with dynamic sections view
- Possibility to customize on request residual stress evaluation algorithm


 OES MAINTENANCE & CALIBRATION: